|
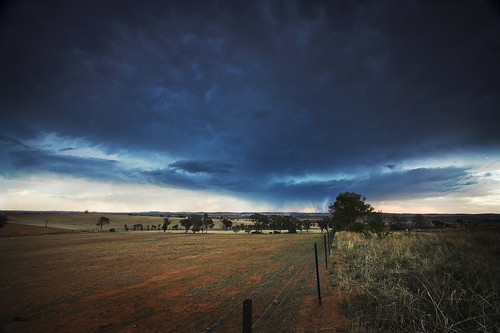
| Lightning in the hills West of Wagga Wagga 9/11/2011 |
So last night we had a half decent light show; the first of the season however fleeting it was. And while I was standing out on the side of the road, swatting the occasional mozzy and listening to the rolling waves of thunder, a comment from another weather enthusiast was on my mind: "I wish I knew how to photograph lightning..."
Well, what an excellent topic for a blog!
The thing about lightning is that it happens quickly, damn quickly. Occasionally you'll be lucky to get a storm that produces pulsating lightning (where the bolt travels from the cloud to the ground a number of times) and when this happens you almost have a shot at reacting fast enough to capture it just as you would any other scene.
But these are rare occurences and certainly in my time it has not happened more than once or twice. So we need other methods to try and capture these fleeting demonstrations of Mother Nature's power.
Essentially there are two methods: a lightning trigger and long exposures (you can read about exposures
here).
Lightning triggers - and I won't go into the electronics because I wouldn't have the foggiest - work by sensing the pulse of light and relaying a signal to the camera. These are almost essential for capturing lightning during bright daylight conditions (the above photo, although it appears to be during the day, was a 15s exposure. So the scene, to the naked eye was actually quite dark) unless you are willing to fire away like a machine gunner under attack and hope that you catch one by fluke. Now for most people (including myself) a lightning trigger, which can set you back as much as $400, is simply not worth the few occasions a year you might actually get a chance to use it. That leaves us with long exposures...
 |
| Lightning over Coolamon - luck of the Irish! |
For a long exposure to work (and I'm probably suggesting anything over 5 seconds, depending on how frequent the lightning is) it needs to be fairly dark. Of course you could stop down your appeture, thereby restricting the amount of light that gets through, but this will really limit you to close up lightning; probably too close for comfort! Ideally you want to be working with appetures f/8 and under.
In terms of exposure, you want to start thinking about trying to get 5s or longer. Once it gets really dark - as in during the night - if you want any chance of capturing a bit of detail in the foreground or the clouds you're also going to need to start looking at exposures longer than 30s. For this you will need a camera that has a "bulb" option for the shutter. This allows you to hold open the shutter indefinitely. Of course you won't be able to physically hold down the shutter button indefinitely, so to overcome this problem you need to get yourself a suitable remote. This can be anywhere from $10 for a grey import through to a couple of hundred for a genuine fully featured remote. This will also solve blur issues of handling your camera while the shutter is open.
Now with long exposures comes the need for a solid rest for your camera; a tripod is an absolute must. You can pick up a great one for under $200 and for anyone serious about photography, they're simply priceless.
The toughest part of all this (not an issue during the day) is focusing. I've had many a rip-snorting lightning strike ruined because I hadn't yet got the focusing spot-on. Of course your best bet is to hope that there are some lights on which to focus at about the same distance from you as the lightning, but in the rural and regional areas this can be pretty tough to find. If you don't have any lights or objects on which to focus, you can try focusing to infinity (a symbol like an 8 on its side) and then bringing the focus back just a tad, taking a photo and checking it out (again, the beauty of digital!) before adjusting it and repeating.
One little trick is to - during the day - grab your lens and a whiteout pen and make some very small marks on the barrel of the lens and the focus ring (if you have a lens with no markings and making sure you don't gum up the lens) at varying distances. The distances vary from person to person and personally I have just one that corresponds to lightning ~40km away on my common landscape lens. You can then use that during the night to arrive at the correct focus sooner, minimising the number of superb strikes that you miss out on while getting the focus right.
So that is pretty much it; all you have to do now is wait patiently for a storm in the right spot, at the right distance and without rain effecting you to give it a go - and that happens all the time doesn't it?!
One quick note on safety though: lightning is deadly and unpredictable. A bolt can strike tens of kilometres ahead of, to the sides or rear of a thunderstorm. There are no real rules for lightning, it will hit high points, it will hit low points and it can just as easily hit you if you're too close. Keep in mind too that you will probably be running around with a long metal pole (your tripod) so just keep your distance and don't be afraid to pull back if you think it's getting too close.
 |
Be prepared for disappointment: in a small version this
doesn't look too bad, but unfortunately the focus is way
out, ruining an otherwise terrific lightning shot! |